Monday, July 18, 2011

Extra Pictures

Rocks: 4/28/11; Rexburg, Idaho, 5PM, f9, 1/32, Nikon D3000


Bubbles: 6/15/11; Rexburg, Idaho, 5PM, f8, 1/250, Nikon D3000
Temple: 6/6/11; Rexburg, Idaho, 10PM, f3.5, 1/13, Nikon D3000


Adric: 6/15/11; Rexburg, Idaho, 5PM, f8, 1/500, Nikon D3000


Adelyn: 6/15/11; Rexburg, Idaho, 5PM, f8, 1/125, Nikon D3000

Bird: 6/28/11; Rexburg, Idaho, 11AM, f5.6, 1/60, Nikon D3000


Wood: 4/28/11; Rexburg, Idaho, 2PM, f5.6, 1/152, Nikon D3000

Tree: 6/30/11; Rexburg, Idaho, 5PM, f8, 1/250, Nikon D3000

Tulip: 5/7/11; Rexburg, Idaho, 9AM, f5.6, 1/500, Nikon D3000

Soda: 6/24/11; Rexburg, Idaho, 10PM, f11, 0.4, Nikon D3000

Yellow Bird: 6/20/11; Rexburg, Idaho, 11AM, f5.6, 1/5, Nikon D3000
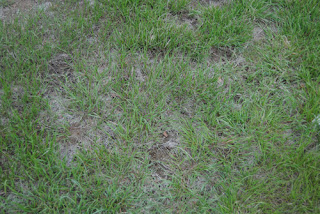
Grass: 5/25/11; Rexburg, Idaho, 8AM, f4.5, 1/320, Nikon D3000

Wednesday, July 13, 2011

Photolusion

Car: 7/12/11, Rexburg, Idaho, 9PM, f9, 1/15, Nikon D3000
I was about 50 feet away from the car, sitting down the the sidewalk. I zoomed in so I could get rid of everything in the background. I took a couple shots to make sure I got the right amount of focus. I didn't want the car to be completely crisp because I wanted the had to have more focus so it would help with the illusion the car was really little. I then took a picture of my roommates hand. It took awhile to make sure she had enough "cup" in her hand so it looked like she was holding the car.

Photo Journal

Wednesday 6/15/11, Rexburg, Idaho, 6PM, f8, 1/400, Nikon D3000


Thursday 6/16/11, Rexburg, Idaho 6PM, f4.2, 1/15, Nikon D3000


Friday 6/17/11, Rexburg, Idaho 6PM, f4.2, 1/5, Nikon D3000

 
Saturday 6/18/11, Rexburg, Idaho 6PM, f5.6, 1/800, Nikon D3000

Sunday 6/19/11, Rexburg, Idaho 11AM, f5.6, 1/60, Nikon D3000


Monday 6/20/11, Rexburg, Idaho11PM, f5.6, 1/5, Nikon D3000


Tuesday 6/21/11, Rexburg, Idaho 12AM, f4.8, 15, Nikon D3000

I edited my Wednesday picture but just adjusting the sats and vibrance in camera raw. Other than that all the images are exactly how they were taken. I didn't want to mess with editing too much because I feel that the camera captured the way that I saw it with my own eye. Since this is a photo journal I wanted it to be the way I saw it.

Tuesday, July 12, 2011

Contest

Secret Lake: 6/30/11, Rexburg, Idaho 5PM, f9, 1/320, Nikon D3000

My friend and I always go to this lake that we call our secret lake. Not many people know of it's location so it makes it more enjoyable to be there. This lake is what gets me through the summer because it helps me cool off with the heat and also to relax and get away from everything. There is a dock so I put the camera on the post and rotated it to create a panoramic. I merged them and cropped it to get rid of the jagged edges. I submitted this photo to the Idaho Falls Magazine (http://www.idahofallsmagazine.com/gallery/contest.cfm)
as well as a contest on http://www.reasonstoloveidaho.com/. The photo fits because it is a reason I love Idaho and it was taking within southeastern Idaho. I submitted both photos Tuesday July 12,2011

Monday, June 20, 2011

Poster Images

orange tulips 18 x 24 5/7/11; 10 AM; Perry, UT; Canon EOS Digital Rebel Xsi; Macro Mode; f 4.5; 1/500
I first cropped out some of the rocks in the background. Then the focus was more just on the flowers. I brought out the blacks from the background so that there was more contrast with the flowers. I sharpened the background flowers then adjusted my levels to give it more vibrance. I chose the image because it felt like it was something most like I would put in my house. Orange is my favorite color so I liked the the tulips were orange. 
 
red tulip 18 x 24 5/7/11; 10 AM; Perry, UT; Canon EOS Digital Rebel Xsi; Macro Mode; f 4.5; 1/400
I was only able to crop some of the rocks out of this picture. When I sharpened or increased vibrance it made the picture look really fake. I liked how it wasn't edited at all because it looked so real and fresh. I didn't think flowers should look fake because they are an everyday thing. They aren't like people were we can airbrush their face to get rid of their flaws. All flowers have flaws and that is what is so unique about each one. 
 

With both of these images I was just learning how to work the camera. I went down to utah for the weekend and was playing with my friends camera. I was trying to figure out all the settings and how to change them. My friend had a lot of flowers outside her house so I was just testing the setting on the flowers and getting fun angles on them. The red tulips instantly became my favorite. I loved how vibrant they were and the angle and how infocus the red one was.

Monday, June 13, 2011

Fine Art Template

Night Flower: 6/6/11; Rexburg, ID; 10 PM; f 4; 1/125; Nikon D3000

Tulip: 57/11; Perry,UT; 10 AM f 4.5; 1/500; Canon EOS Digital Rebel Xsi
Dandelion: 5/7/11; Perry,UT; 9 AM f 5.6; 1/400; Canon EOS Digital Rebel Xsi

I like the affect that this template adds to the pictures. It makes me like them a lot more. You can add more of a focus as to what you want the viewer to see. It adds a completely different feel to the whole image. It makes it look more clean and crisp and I really like it. It helps that its easy to do, something so easy but makes a big difference. 

Night and Light

street lights: 6/6/11; Rexburg, ID; 10 PM f 10; 10 sec; Nikon D3000

My friend was driving I was testing the camera to make sure I knew what I was doing. I ended up liking the tests better than after I knew what I was doing. It was a green light and there was a couple cars in front of us so I also picked up their tail lights as well as the normal street lights. I then just moved the camera in all directions. 

Break lights: 6/6/11; Rexburg, ID; 10 PM f 14; 10 sec; Nikon D3000

I did the same thing in this picture as the previous one but this time everybody in front of us was breaking so I captured a lot of red lights. I thought it was interesting how it showed the depth of field in the lights. All the red lights were further away because they were cars. But the White were the street lights that we were passing so they were closer to me. 


Desk: 6/12/11; Rexburg, ID; 10 PM f 4; 3 sec; Nikon D3000

I turned off all the lights and had to put a blanket over the window for the room to be dark enough. My roommate then took a flashlight and shined it on the lamp going in circles. She also swiped it across the desk a couple times to add the affect of the lamp being on. Since I wanted to get a higher angle I look our dining room chairs and stacked them on each other and rested the camera on them so I could hold it steady. 

Car lights: 6/12/11; Rexburg, ID; 10 PM f 14; 5 sec; Nikon D3000

I put the tripod on the sidewalk and waited for cars to pass by. It took a couple tries to get the shutter at a decent speed with the speed of the cars. Once I figured it out there weren't anymore cars so I only ended up with one. But I still like how it turned out. 

Sparklers: 6/12/11; Rexburg, ID; 11 PM f 4.5; 5 sec; Nikon D3000

I had my sister and roommate play with sparklers. Each of them had one in each hand. They were looking away from the camera so you would see less of their bodies because they were between the light source and the camera. I didn't want to crop it because I like how they were more to one side in this picture and that the moon. I feel like it adds a more interesting effect to it. To get this angle I had the tripod placed in the parking lot and I was far enough back that I could aim it upward. 
Flower Sparkler: 6/6/11; Rexburg, ID; 11 PM f 6.3; 8 sec; Nikon D3000

A couple of my friends were playing with the sparklers. I told them to do whatever I want, unlike my roommate and sister who both decided to just dance with them my friends made pictures. I had to crop this one out because the other half of the picture didn't look good at all. I'm glad that his body didn't turn up in this picture. In the others it looked like there were ten people because they moved around so much but slowly. 

Monday, June 6, 2011

Edge Effects


Ashley:5/7/11;10AM; Perry,UT; f4; 1/500; Canon EOS Digital Rebel Xsi

I used the sprayed edge effect for this photo. I followed all the steps in the book and did no other edits to the picture. I used the maximum length and radius of the strokes. I used the eye dropper tool to select the pink from her skirt for the boarder. 


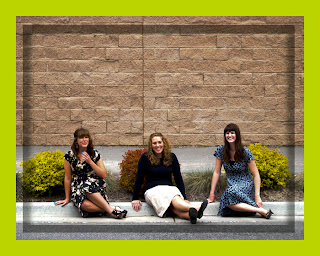
Sidewalk Girls: 5/22/11: 1PM; Rexburg,ID; f5.6; 1/125, Nikon D3000

In camera raw I decreased the exposure and increased the blacks. I then added a double fade boarder with following all the steps in the book. But instead of having a white rectangle I used a black one so that the faded boarder would be dark and not light. I had the outside boarder the same color as the bushes to have them stand out a little more. 


Trying to be models: 5/22/11: 1PM; Rexburg,ID; f3.8; 1/2000, Nikon D3000 

I added the flexible Vignette to this picture. I followed the steps in the book. The color for the vignette I used the eye dropper tool and selected the color of the skirt from the middle girl. No other edits were done. 

Scanography


interesting mistake: 6/5/11; 10PM; 200ppi; HP PhotoSmart C4700

I had already pressed scan but I thought I had a second or two before it started and I had realized that I forgot one of the perfume bottles so I took off the black fabric and moved things around and quick put the black back on. It only took me a few seconds. I was surprised to see the results of it. I thought it was super interesting because this bottle isn't the one that I thought would be the only one to show up. I also can't figure out what the lines are through the picture. But I thought it looked pretty interesting. 


Tacks: 6/5/11; 10PM; 200ppi; HP PhotoSmart C4700

I just dumped the tacks onto the scanner so that it looked more natural. I didn't place them in any certain order or configuration. I wanted them to all be going different ways so the best way was to just dump and scan. It helps for some tacks to be in better focus than others. To keep the black background I laid a black shirt over the top of them. 


Perfume: 6/5/11; 10PM; 200ppi; HP PhotoSmart C4700

I scanned in each bottle separately. I liked the affect that the black shirt I laid over them had. I didn't want to completely get rid of it. But to blend them together I knew I had to somewhat. So what I did was put them all into one Photoshop document as different layers. I gave them all a blending mode of lighten. I liked how it gave them more of a ghost look. I liked how with having the liquid in the bottles It really made for a different texture on the bottles. The thicker the bottle the more affect. I then just placed the bottles so they fit together. I had to keep in mind how the background would turn out. I had them rearranged but then the background had one section that was really dark and one that was pretty light. I just moved around until it was spread out through the whole thing.